Presets
Insert reusable bits of code in the visual editor.
Use presets to quickly insert repeated code across your emails in a single workspace. There is no cap to the number of presets you can make!
Using the code editor only? Create snippets instead!
Check out our guide on presets for a video walkthrough!
To create a preset, you start by creating a component. To the right of Files on the Sidebar, click "+". Click New Component. Add presets to the script tag, and leave the template tag blank. Here's an example of a few presets in a single file:
<script>
  export const config = {
    label: "presets",
    presets: [
      {
        label: "Hero",
        icon: "landscape",
        section: 'Presets',
        content: '<x-image src="https://fakeimg.pl/1200x560/0B353B/E4FFCE?text=Hero+Image&font=lobster" alt="" margin="0"/>'
      },
      {
        label: "Hello world",
        icon: "waving_hand",
        section: 'Presets',
        content:'<x-heading-1>Hello world</x-heading-1>'
      },
      {
        label: "Photo testimonial",
        icon: "id_card",
        section: 'Presets',
        content: '<cio-box variant="highlight" style="display:table;border-spacing:20px"> <temp-column width="30%"><x-image src="/CIO components/assets/placeholder-testimonial.png" width="200px"/> </temp-column><temp-column width="70%"><cio-heading element="x-heading-2" margin="0 0 1em" color="#0B353B">A catchy phrase about this use case to grab people\'s attention</cio-heading><x-paragraph>Lorem ipsum dolor sit amet consectetur adipisicing elit. Voluptatibus recusandae ad veritatis modi autem maxime! Id eius fuga libero dignissimos labore aliquid dicta sint inventore? Expedita ad laboriosam facilis ipsam.</x-paragraph><cio-cta variant="secondary">Secondary CTA</cio-cta></temp-column></cio-box>'
      },
    ]
  }
</script>
<template></template>
Notice that the third preset, Photo testimonial, is built on a custom component <cio-box>. Presets can include HTML tags, standard components, and custom components within the content field.
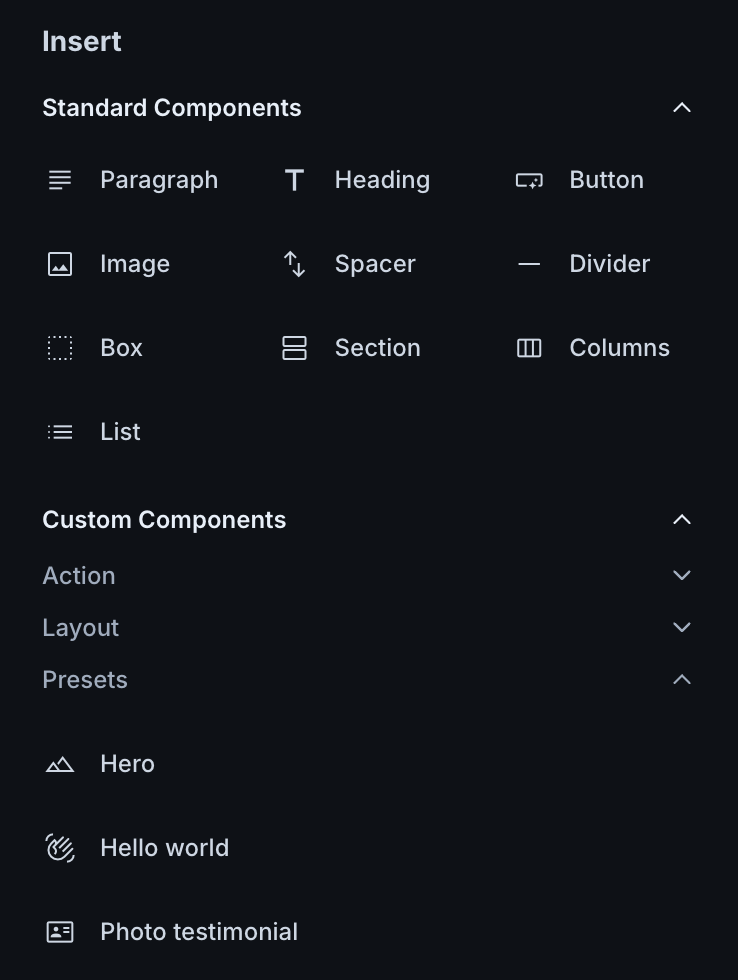
The label and icon appear in the Insert Menu under Custom Components. These presets will all be nested under the section titled "Presets."

To add a preset, open your email using the visual editor. Drag your preset from the Insert Menu and drop it onto the canvas. If you switch to the code editor, you'll see that the code within the content field of the preset was added in.
If you change the preset file later on, changes will NOT cascade to emails where the preset is used.
You can share presets for feedback, but they will not appear across your workspaces or in other team members' workspaces. Click Share in the top right of a preset file to get started.
To delete a preset, right-click on the preset file name in Files. Click Delete and confirm your action.
This will NOT delete the preset code from any email where it's in use.