Message settings
Style your base component
Message settings appear on the right of the canvas. These are attributes you can set on your base component. You can open and close it by clicking the gear icon.
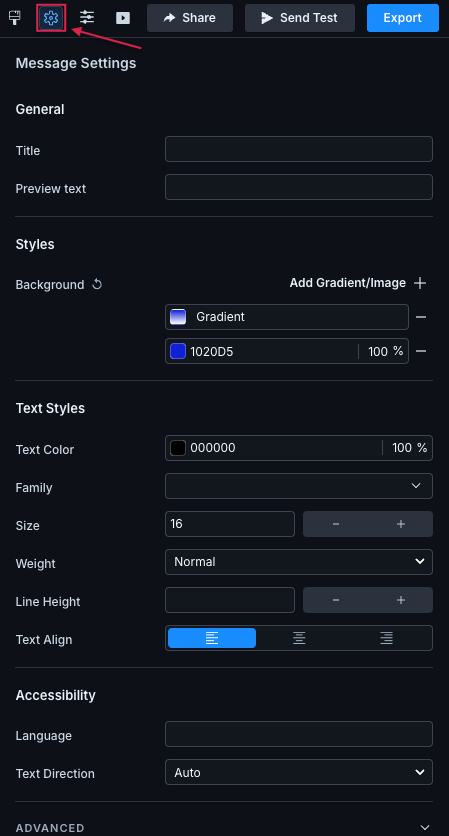
If you're building an email from scratch in the visual editor, we add <x-base> behind-the-scenes as the outermost element in your email. You can edit the properties of this component through Message settings.
If you've made your own base component, you need to add componentType: 'root' to your component's <script> tag first:
export const config = {
    label: "CIO Base" ,
    componentType: "root"
  };
Then you'll be able to modify its properties from Message settings.
You can set a background for your entire message through Message settings. You can set a solid color, gradient, or image. By default, the background is transparent. Consider the email clients your customers use, as some support images and gradients while others do not.
To set a solid, background color:
- Click Message settings.
- Under Styles > Background, enter the hex value of the color and the opacity percentage or click the preview icon to choose a color and opacity.
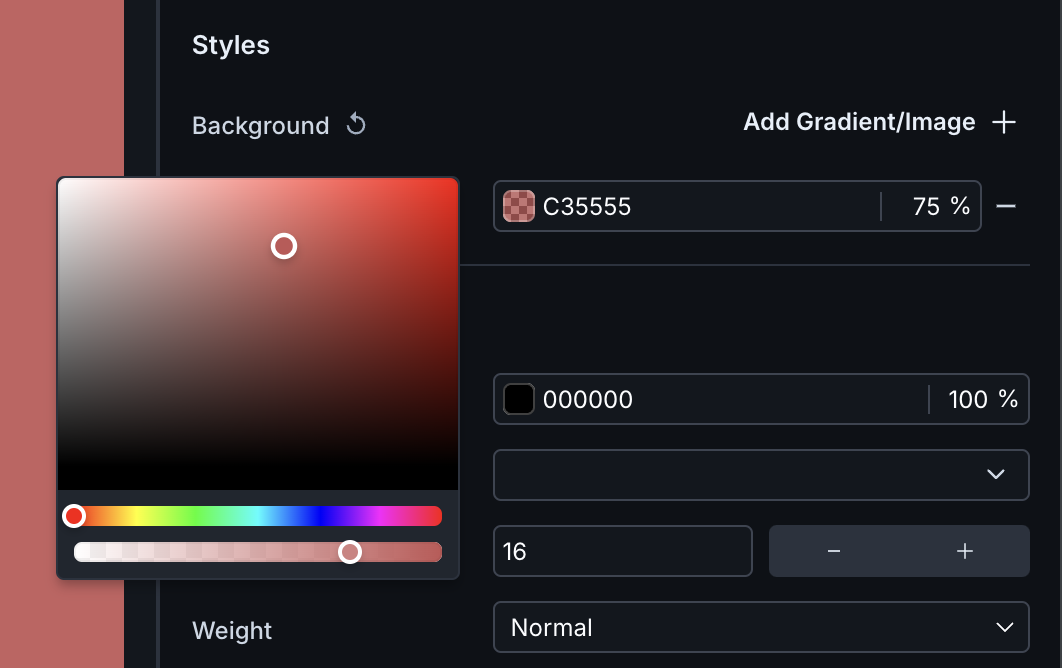
Set the background color of a component. - Preview your changes in the visual editor and send a test to see how it renders in your email client.
To reset your background color, click the subtraction icon to the right of the field.
To set an image as the background of your email:
- Click Message settings.
- Under Styles > Background, set a fallback color in case your customers' email clients do not support images.
- Click Add Gradient/Image.
- Click the new field then choose Image from the pop-up.
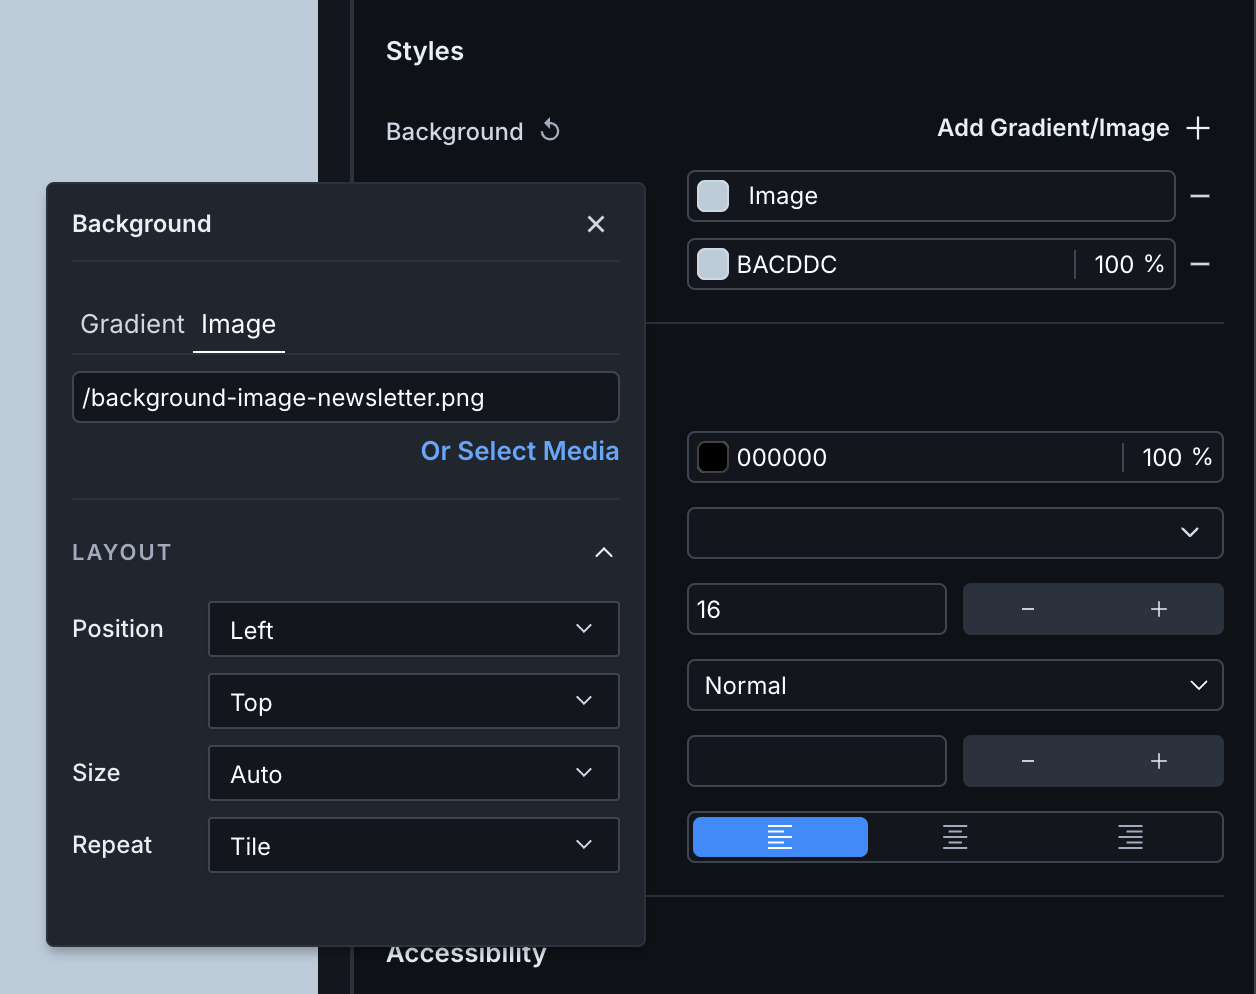
The pop-up where you add your image and set layout properties - Paste the image URL if hosted outside Parcel or choose "Select Media" and browse for a file in your workspace. Keep in mind, when you officially send this email, you must host these images outside of Parcel.
- Modify the layout properties as you see fit. You can change the position, size and repeat of the background image.
- Preview your changes in the visual editor and send a test to see how it renders in your email client.
To remove the background image, click the subtraction icon to the right of the field.
To set a gradient as the background of your email:
- Click Message settings.
- Under Styles > Background, set a fallback color in case your customers' email clients do not support gradients.
- Click Add Gradient/Image.
- Click the new field and you'll see that by default, we set a linear gradient based on your background color.
- To change the gradient to radial and access other settings, click the icon beside the gradient in the pop-up.
- You can also set layout properties. Modify the size then specify how you want the gradient to repeat or how you want to position it in the background.
- Preview your changes in the visual editor and send a test to see how it renders in your email client.
To remove the gradient, click the subtraction icon to the right of the field.
We do not support conic gradients.
To access gradient settings, click the gradient in message settings then select the gradient preview.
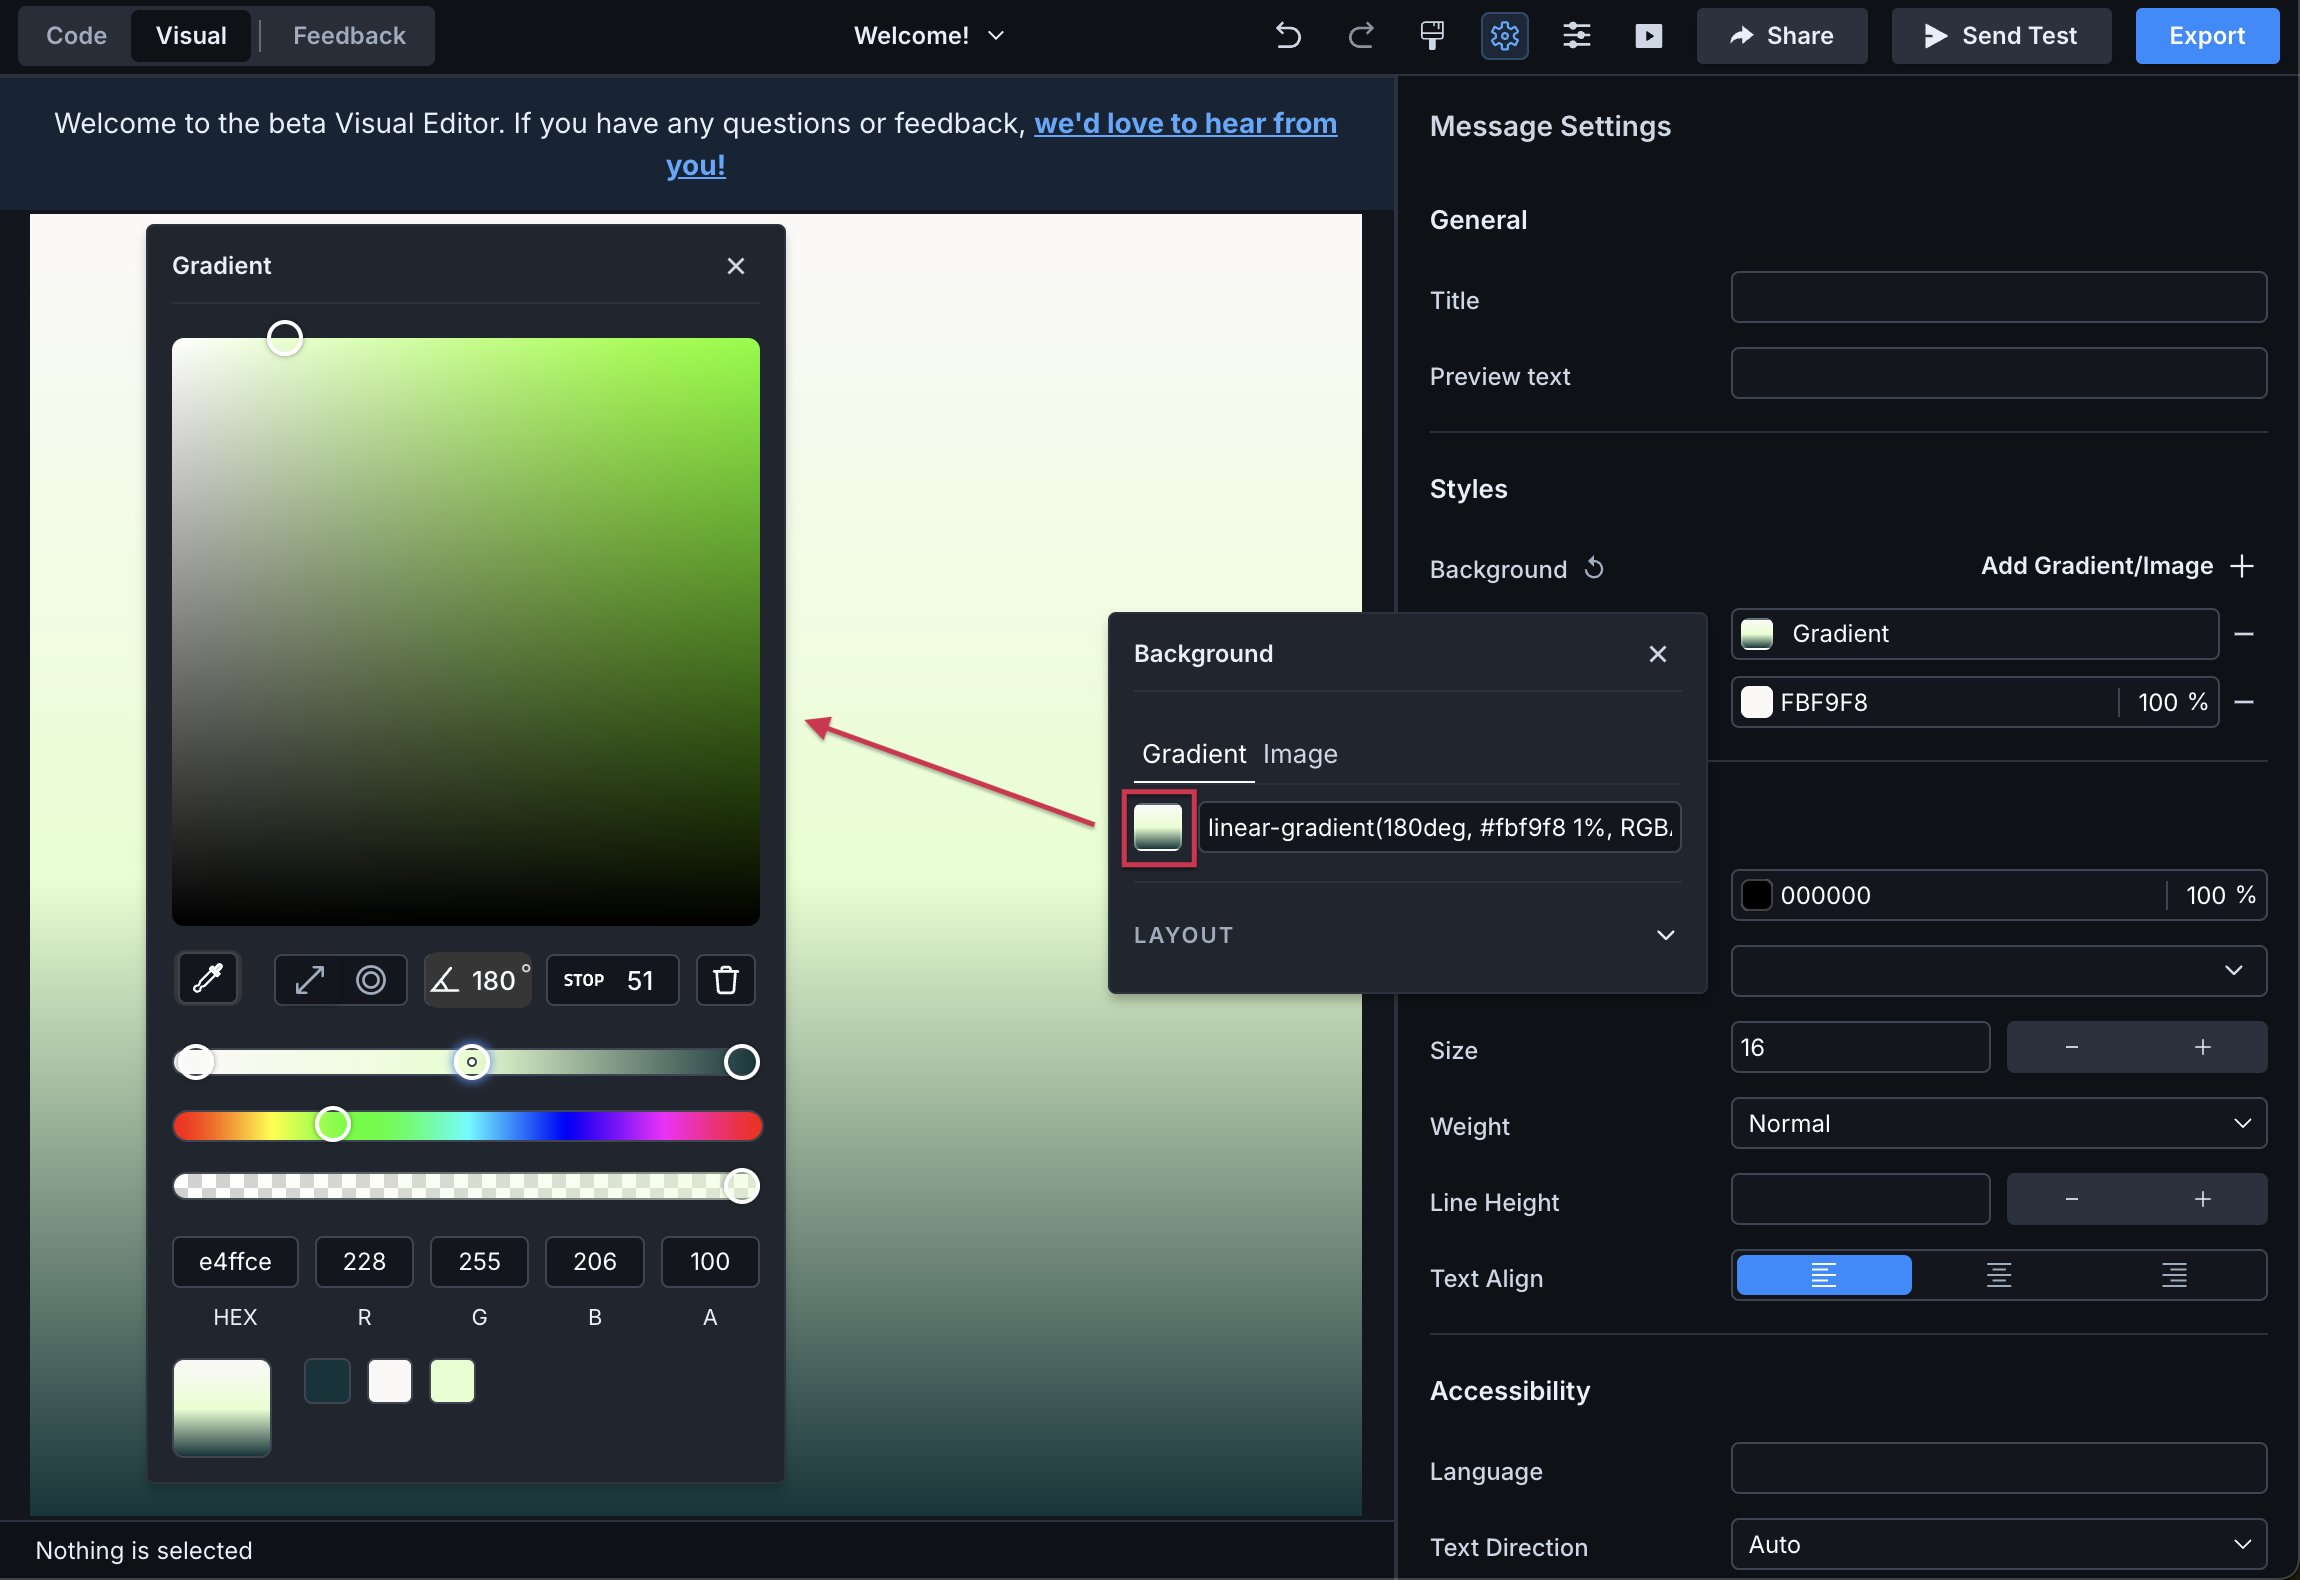
Use the eyedropper to identify a color not in your email yet. Any color in use in your email will appear at the bottom of the gradient pop-up.
By default, we set a linear gradient. You can change the angle of the gradient by typing a different degree (0-360).
You can also switch to a radial gradient by clicking the radial icon.
Add color stops by clicking a location on the top slider. While selected, choose an existing color from the bottom or type in the hex or rgba value.
Alternatively, you can choose a color from the second slider then change the shade up top. Adjust the opacity as you see fit on the bottom slider.
Click the trash icon to delete the selected stop.
If you're setting a background on your message or component, set a solid color as a fallback. Not all email clients support gradients and background images, but they do solid colors. You can find out more about email client support at Can I Email.
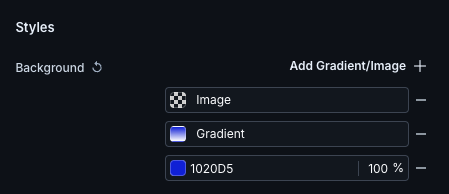
Also note, your background settings are evaluated from top to bottom. In the example above, if the email client doesn't support multiple, layered backgrounds or if it doesn't support gradients, then we will provide a fallback of the image over the solid, background color. If images aren't supported either, then just the solid color background will render.